Crispy, juicy chicken wings are a favorite appetizer for many. But to get the best texture and flavor, a key preparatory step is blanching. So what exactly does it mean to blanch chicken wings? In this comprehensive guide, we’ll cover everything you need to know.
What is Blanching?
Blanching is a cooking technique where food is briefly immersed in boiling water followed by rapid cooling in an ice water bath. This process partially cooks the food and stops the cooking at just the right point to preserve color texture, and flavor.
When applied to chicken wings, blanching offers several advantages:
-
When wings are fried or baked, it helps the skin get really crispy.
-
It cooks the wings just enough to kill any surface bacteria This improves food safety.
-
It removes impurities like blood from the skin for a cleaner appearance.
-
It allows seasonings and marinades to better penetrate the meat.
So in short, blanching chicken wings prepares them for further cooking by improving texture, enhancing flavor, and ensuring food safety.
Why Blanch Chicken Wings?
Here are the main reasons you should blanch chicken wings before cooking them:
Tighter Skin and Improved Texture
Blanching causes the proteins in the skin to contract and tighten. This sets the wings up for an ultra crispy exterior when they are fried or baked afterward. It also partially denatures the proteins in the meat, allowing them to retain moisture better. The result is juicy meat that isn’t dried out.
Enhanced Flavor
Blanching helps remove impurities like blood from the skin surface. This cleans up the flavor. Blanching also lets marinades and seasonings get into the meat evenly and deeply. So wings develop a more pronounced, well-rounded taste.
Food Safety
Any germs that are on the wings’ outside are killed by the hot blanching water. This reduces the risk of foodborne illness. Blanching the wings also cooks them partially, which helps them get to the safe serving temperature faster during the last cook.
Shorter Cook Time
Since blanching partially cooks the wings, it reduces the time needed to fully cook them later. This makes blanched wings faster and more convenient.
Easier Sauce Adhesion
The blanching process removes excess fat and causes the skin proteins to unfold. This creates a better surface for sauces and glazes to stick to the wings.
How to Blanch Chicken Wings
Blanching wings is simple but proper technique is important. Follow these steps:
Step 1: Prepare Ice Water Bath
Fill a large bowl with ice water and set aside. This ice bath will be used to quickly cool the wings after blanching to stop the cooking.
Step 2: Bring Water to Boil
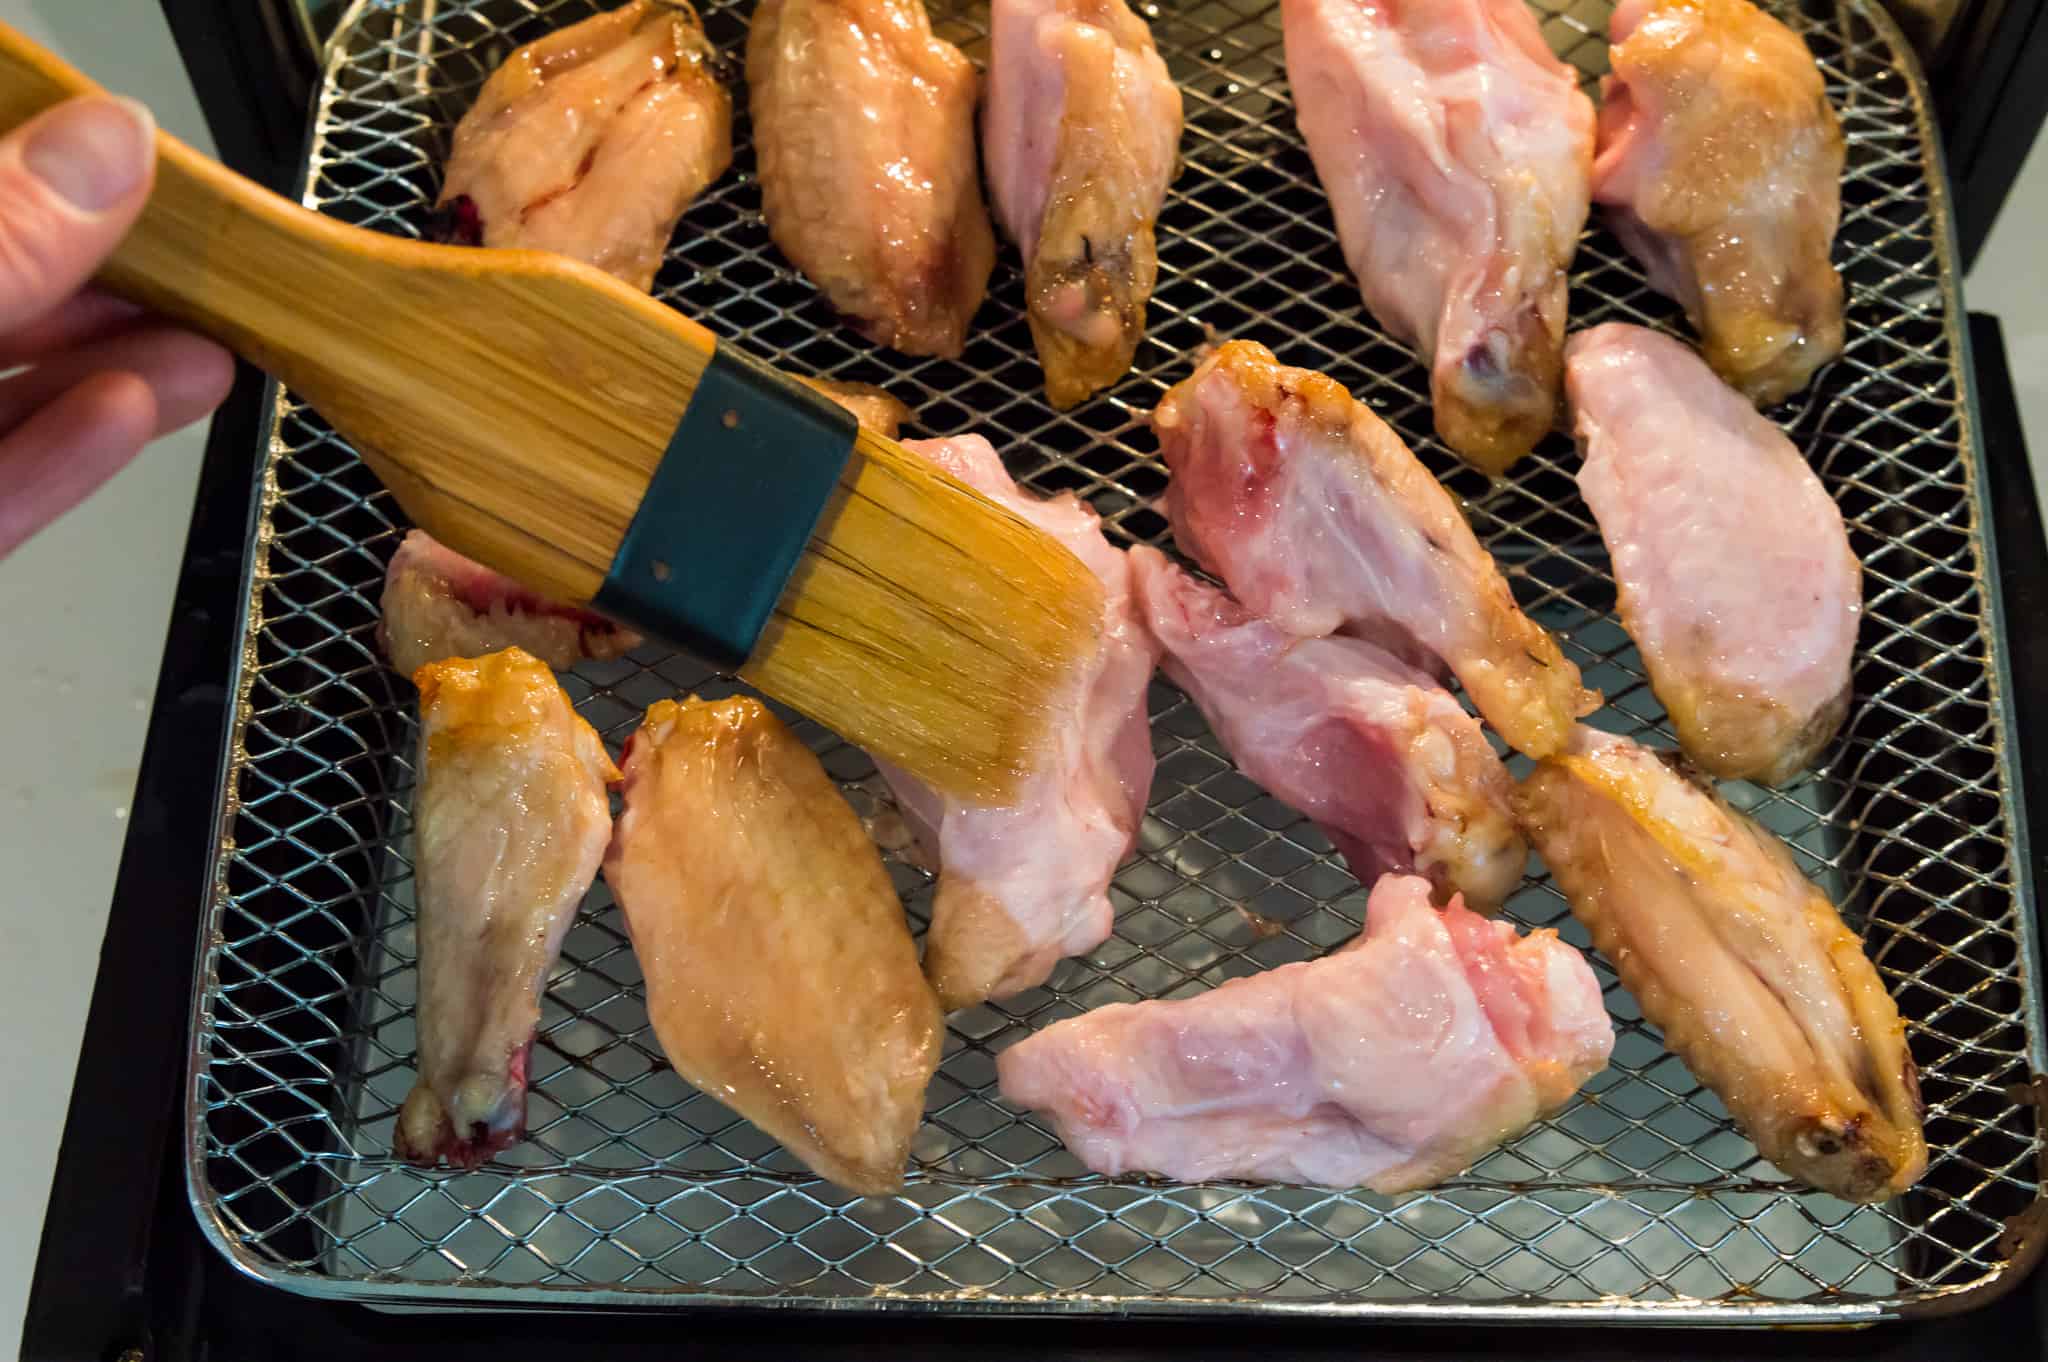
Fill a pot with enough water to submerge the wings and bring to a rolling boil over high heat. Add 1 Tbsp of salt to the water.
Step 3: Add Wings and Blanch
Once the water is rapidly boiling, carefully add the chicken wings. Blanch for 5-8 minutes, adjusting time as needed based on size of wings.
Step 4: Transfer to Ice Bath
After blanching, immediately transfer the wings to the prepared ice water bath using a slotted spoon or tongs. This halts the cooking.
Step 5: Pat Wings Dry
Remove wings from the ice bath and pat dry with paper towels. At this point they are ready to season and cook as desired.
And that’s it – simple, quick and effective. Now, let’s talk about some important ways to blanch chicken wings the right way.
Tips for Perfectly Blanching Wings
Follow these tips for best results when blanching wings:
-
Use very fresh, high quality wings – this ensures the best flavor and texture.
-
Don’t overcrowd the pot – cook wings in batches if needed to allow even blanching.
-
Monitor water temp with a thermometer – maintain between 180°F-190°F.
-
Adjust blanching time based on wing size – larger wings need a bit longer.
-
Immediately cool in an ice bath after blanching to halt cooking.
-
Drain wings well and pat completely dry before seasoning or cooking further.
-
Season wings while still hot after blanching to maximize flavor absorption.
Proper technique is important, but blanching wings isn’t difficult. Follow these tips and you’ll be rewarded with perfect, restaurant-quality wings every time.
Blanching Wings vs Frying Raw
Frying raw chicken wings without blanching first is certainly an option. However, blanching provides some clear advantages:
-
Blanching further cooks the wings internally before frying. This reduces the frying time needed for food safety.
-
It tightens the skin better than frying alone, resulting in an extra crispy texture.
-
Blanching cleans the skin and allows for better adhesion of dredges and sauces.
-
Overall, blanching before frying improves the flavor, texture, and appearance of fried chicken wings.
So while frying raw wings is definitely possible, blanching first takes the end result to the next level. The modest extra effort pays off.
Common Blanching Mistakes
Here are some common mistakes to avoid when blanching chicken wings:
-
Not bringing the water to a full rolling boil before adding wings. This can lead to uneven cooking.
-
Overcrowding the pot which causes the water temperature to drop. Blanch in batches if needed.
-
Not monitoring water temp. It should stay between 180°F-190°F for best results.
-
Blanching too long, which can make the texture rubbery. 5-8 minutes is usually sufficient.
-
Not shocking in an ice bath immediately after blanching to stop the cooking.
-
Skipping drying the wings after blanching, which can make the skin soggy.
Avoid these pitfalls, and your blanched wings will turn out perfectly each time. Proper technique makes all the difference.
Blanching Wings for Various Cooking Methods
Blanching is a great preparatory step whether you plan to deep fry, oven bake, grill, or smoke your chicken wings.
For deep fried wings, blanching crisps up the skin and adheres dredges better. For baked wings, it shortens cooking time while boosting juiciness. With grilled wings, it allows better seasoning penetration and cuts down on cooking time. And for smoked wings, blanching first enables you to skip brining and helps the smoke flavor absorb better.
So blanching offers advantages no matter which cooking method you use. It takes your wings to the next level across cooking techniques.
That covers the complete ins and outs of blanching chicken wings. To summarize:
-
Blanching briefly cooks wings in boiling water followed by an ice bath.
-
It results in crisper skin, juicier meat, cleaner flavor, and enhanced food safety.
-
Properly blanch wings by bringing ample water to a boil, adding wings for 5-8 minutes, then ice bath cooling.
-
Blanch wings before frying, baking, grilling, or smoking for maximum benefits.
-
Avoid common mistakes like overcrowding and insufficient cooling after blanching.
Understanding the blanching process allows you to transform basic wings into irresistibly crispy, juicy and flavorful appetizers and entrees. Use this guide to get comfortable with this essential technique. Your wings will never be the same!
Enhance Your Chicken Thighs’ Flavor and Texture with This Simple Technique: Blanching

Chicken thighs are one of the most versatile and flavorful cuts of chicken. They are perfect for grilling, baking, frying, and even slow cooking. However, there is one simple trick that you may not have tried yet to make your chicken thighs even better – pouring boiling water on them. In this article, we will explain why you should pour boiling water on your chicken thighs and how to do it properly.
Benefits of Pouring Boiling Water on Chicken Thighs
Blanching chicken thighs before cooking offers several benefits:
- Gets rid of extra fat and germs: Boiling water helps get rid of extra fat and germs on the chicken thighs’ surface, making the dish cleaner and healthier.
- Better color and texture: Blanching your chicken thighs can help the color and texture by getting rid of any spots or discolorations.
- Improves flavor: Getting rid of extra fat and impurities can help your chicken thighs taste better. Blanching can also help your chicken thighs keep their moisture, which will make the dish juicier and more flavorful.

What Does Boneless Chicken Wings Really Mean?? #funfact
FAQ
How do you blanch chicken wings?
For about 4 quarts of water, bring it to a full boil. Then add a tablespoon of salt. Add the chicken wings, let the water come back to a boil, and cook them for 7 minutes. Drain the wings well in a colander—keep in mind that they’re only partially cooked at this stage.
What does “blanching wings” mean?
To Blanch means to plunge food in boiling water briefly to tenderize it. Then submerge it in ice water to instantly stop cooking.
What does blanching chicken do?
Blanching chicken involves briefly boiling it in water and then immediately transferring it to cold water. This is done to get rid of impurities like blood and myoglobin, clean up broths or stocks made from chicken, and get rid of smells that come from game.
Is it necessary to blanch chicken?
Here’s why it matters: Removes Impurities: Blanching helps to remove blood, impurities, and some fat from the chicken bones and meat. This results in a clearer stock. Improves Taste: Blanching can get rid of any unpleasant tastes that come from raw bones and meat, making the final stock taste better.