As a home cook who loves making delicious chicken dishes for my family, I’ve learned that basting is the key to getting tender, moist chicken breast with amazing flavor. After years of trial and error, I’ve mastered the art of basting chicken breast – and I’m excited to share my secrets with you!
What is Basting and Why Does it Matter?
Basting is the process of spooning or brushing liquid over meat as it cooks This serves two important purposes
-
It keeps the meat moist. Because it doesn’t have much fat, chicken breast tends to dry out. Basting adds extra moisture to the lean breast meat to keep it from getting tough and chewy.
-
It adds flavor. When you baste chicken, it soaks up the flavors of the liquid you use to baste it.
Proper basting technique is the difference between dry, bland chicken breast and succulent, flavor-packed perfection.
Basting Essentials: Liquid, Tools, and Timing
Basting chicken breast requires just a few key ingredients and tools:
Basting Liquids
-
Butter – Melted butter bastes while adding richness.
-
Broth – Chicken broth keeps meat moist and imparts savory flavor.
-
Oil – Oils like olive or avocado oil baste well while lending flavor.
-
Marinades – Marinade doubles as a flavored basting liquid.
-
Herb Butter – Butter mixed with herbs and spices takes basting to the next level.
Basting Tools
-
Baster – A turkey baster neatly applies basting liquid.
-
Brush – A silicone basting brush can also be used.
-
Spoon – A basic spoon works for hand basting.
Timing
-
Baste every 10-15 minutes while cooking chicken breast.
-
Be quick – limit oven time to 1-2 minutes during basting.
-
Baste just before serving for a glossy finish.
Basting Step-By-Step
Follow these simple steps for perfectly basted chicken breast:
Step 1: Preheat Oven and Prepare Chicken
-
Preheat oven to 350°F.
-
Season chicken all over with salt, pepper and spices.
-
Optional: Pound chicken to even thickness.
Step 2: Sear the Chicken (10-15 minutes)
-
Heat oil in ovenproof skillet over medium-high heat.
-
Cook chicken pieces skin-side down until browned, about 5-7 minutes.
-
Flip and brown other side, 3-5 minutes more.
-
Searing seals in juices and builds fond for basting.
Step 3: Transfer to Oven and Baste (Repeat Every 10-15 Minutes)
-
Place skillet with seared chicken in preheated oven.
-
After 10 minutes, remove skillet and baste chicken:
-
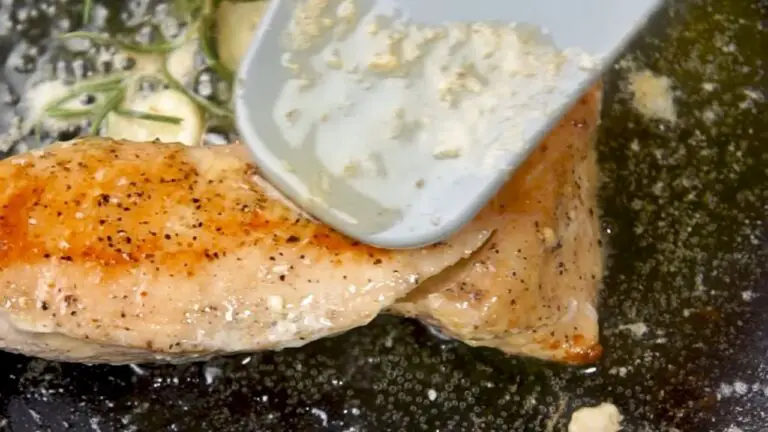
Use a spoon to scoop up pan juices and drizzle over each piece.
-
Optional: Brush with herb butter or other basting liquid.
-
-
Return to oven quickly, close door, reset timer.
-
Repeat basting every 10-15 minutes until done.
Step 4: Check for Doneness
-
Breasts are done at an internal temp of 165°F.
-
Cut into thickest part to check with a meat thermometer.
-
Juices will run clear when chicken is fully cooked.
Step 5: Final Baste and Rest
-
Once chicken reaches 165°F, remove from oven.
-
Give pieces a final baste with any juices in pan.
-
Tent foil over chicken and let rest 5 minutes.
-
This last baste gives the chicken a glossy sheen.
-
Resting allows juices to reabsorb for maximum moisture.
Basting Tips and Tricks
I’ve discovered some helpful tips for getting the most out of basting:
-
Use a high smoke point oil like avocado to sear chicken before basting.
-
Put herb butter or marinade on top at the end to make it taste even better.
-
Add aromatics like garlic, rosemary or lemon to melted butter before basting.
-
Brown chicken skin-side down first for crispy skin that basting won’t ruin.
-
Don’t discard marinade used to brine chicken – boil to sanitize then use for basting.
Basting Alternatives
While basting while roasting is ideal, there are other ways to add flavorful moisture to chicken breasts:
-
Brining – Soaking chicken in a saltwater brine before cooking.
-
Butter Under Skin – Placing pieces of flavored butter under the skin.
-
Cheesecloth – Covering with butter-soaked cheesecloth while cooking.
-
Sear then Braise – Browning chicken then braising it in liquid.
-
Grill Basting – Frequently brushing with sauce on the grill.
So while traditional basting is best, these alternatives can also do the trick in a pinch.
Take Your Chicken Breast to the Next Level
I hope these basting tips help you achieve the juiciest, most flavorful chicken breast possible. Proper basting technique makes all the difference between dry, boring chicken and succulent, restaurant-quality perfection.
StepsMethod
- 1. Follow your favorite recipe for roast chicken until it’s time to cook. Heat the oven to the level your recipe says and put the chicken in there. Don’t put your bird on a baking sheet when you roast it; the juices could get on the baking sheet. Instead, use a roasting pan. If the recipe says to roast the vegetables in the same pan as the chicken, do it in a different pan so the basting liquid doesn’t cook them too much. Chickens will typically take 20 minutes per pound (0. 45 kg) plus an extra 15 minutes of roasting time to cook all the way through An internal meat thermometer should read at least 165° F (74° C) for a chicken to be ready. [2] .
- 2. In a microwave safe bowl, melt one stick of butter, which is about half a cup or 110 grams. Take out a half-cup (7.62 g) stick of butter and put it in a bowl that can go in the microwave. In 15-second bursts, heat the butter until it melts completely. You will baste with butter at first because it takes a while for the chicken to start putting its own fat into the pan. [3] Advertisement .
- 3. Take the pan out of the oven 30 minutes into the roast. Place your pan on a surface that can handle heat, like the stovetop. To keep the oven hot, close the door. Have your melted butter and a turkey baster nearby. [4] .
- 4 Perform your first baste. But be careful when you’re close to the hot roasting pan. Squeeze the baster’s bulb while the tip is in the melted butter. When you slowly let go of the bulb, warm butter will rise into the baster. Squeeze the bulb gently over the chicken to cover it in melted butter. [5] If you need to, get more butter from the bowl to coat the chicken. Is your chicken really big? You can melt some more butter if you need to cover the whole thing. Be quick (but careful!) and don’t let the chicken sit out of the oven for more than a minute or two. It will take longer to cook your chicken if you wait too long to baste it. [6] .
- 5 Place the hot roasting pan back in the oven. When you put the roasting pan back in the oven, protect your hands with oven mitts. Set a timer for 30 minutes.
- 6 Perform the second baste when the timer goes off. When you take the chicken out of the oven, dip the baster tip into the meaty chicken fat at the bottom of the roasting pan. Use this liquid to cover the chicken all over. Suck it up into the baster. Repeat as necessary. [7] After coating, place the chicken back in the oven. Watch out not to touch the baster’s tube when it’s full of hot meat. You can burn yourself.
- 7. Baste the chicken with sauce every 30 minutes until it’s done. When you think the chicken is done, use a meat thermometer that can go in the oven to check the temperature inside. The thigh takes the longest to cook, so put the thermometer tip there. When the chicken reaches 165° F (74° C) on the inside, it’s done. [8] If you’re baking chicken parts instead of a whole chicken, baste every 15 to 20 minutes instead of every 30 minutes. [9] .
- 8 Remove your chicken from the oven. Wrap the chicken in foil and set it aside in the roasting pan for 10 minutes to rest once it’s fully cooked. Move it to a cutting board with kitchen tongs. Carve the chicken and serve. [10] .
Advertisement Method
You Might Also Like
Co-authored by:
To baste a roasted chicken, microwave 1/2 cup (110 g) of butter at 15-second intervals until it melts completely. Put the turkey baster’s tip in the melted butter, then gently squeeze and let go of the bulb to let warm butter rise up into it. Take the baster out of the butter and press the bulb over the chicken to cover it with melted butter. Once the chicken is 30 minutes into the roast, baste it once more, and then every 30 minutes until it’s done. If you want to know how to baste your chicken while it’s on the grill, keep reading!
The Best Chicken Breast You’ll Ever Make (Restaurant-Quality) | Epicurious 101
FAQ
What can I baste a chicken with?
In a bowl, prepare basting sauce by combining olive oil, onion, garlic, thyme, rosemary, sage, marjoram, salt, pepper, and hot pepper sauce. Turn chicken breasts in sauce to coat thoroughly.
How to baste chicken in a pan?
Season chicken on all sides with salt and pepper. Add to pan and sear until golden brown and almost cooked through, 4-5 minutes per side. Add 1 TBSP butter, smashed garlic, and thyme sprigs to pan. Once butter melts, tilt pan towards you and repeatedly spoon infused butter over chicken for about 30 seconds.
Should I baste chicken with butter?
Spooning hot butter and aromatics over steak is a common technique, but applying that method to lean, quick-cooking proteins like boneless chicken breasts is particularly beneficial because the butter keeps the white meat from drying out while imparting the flavor of whatever ingredients are sizzling in it.