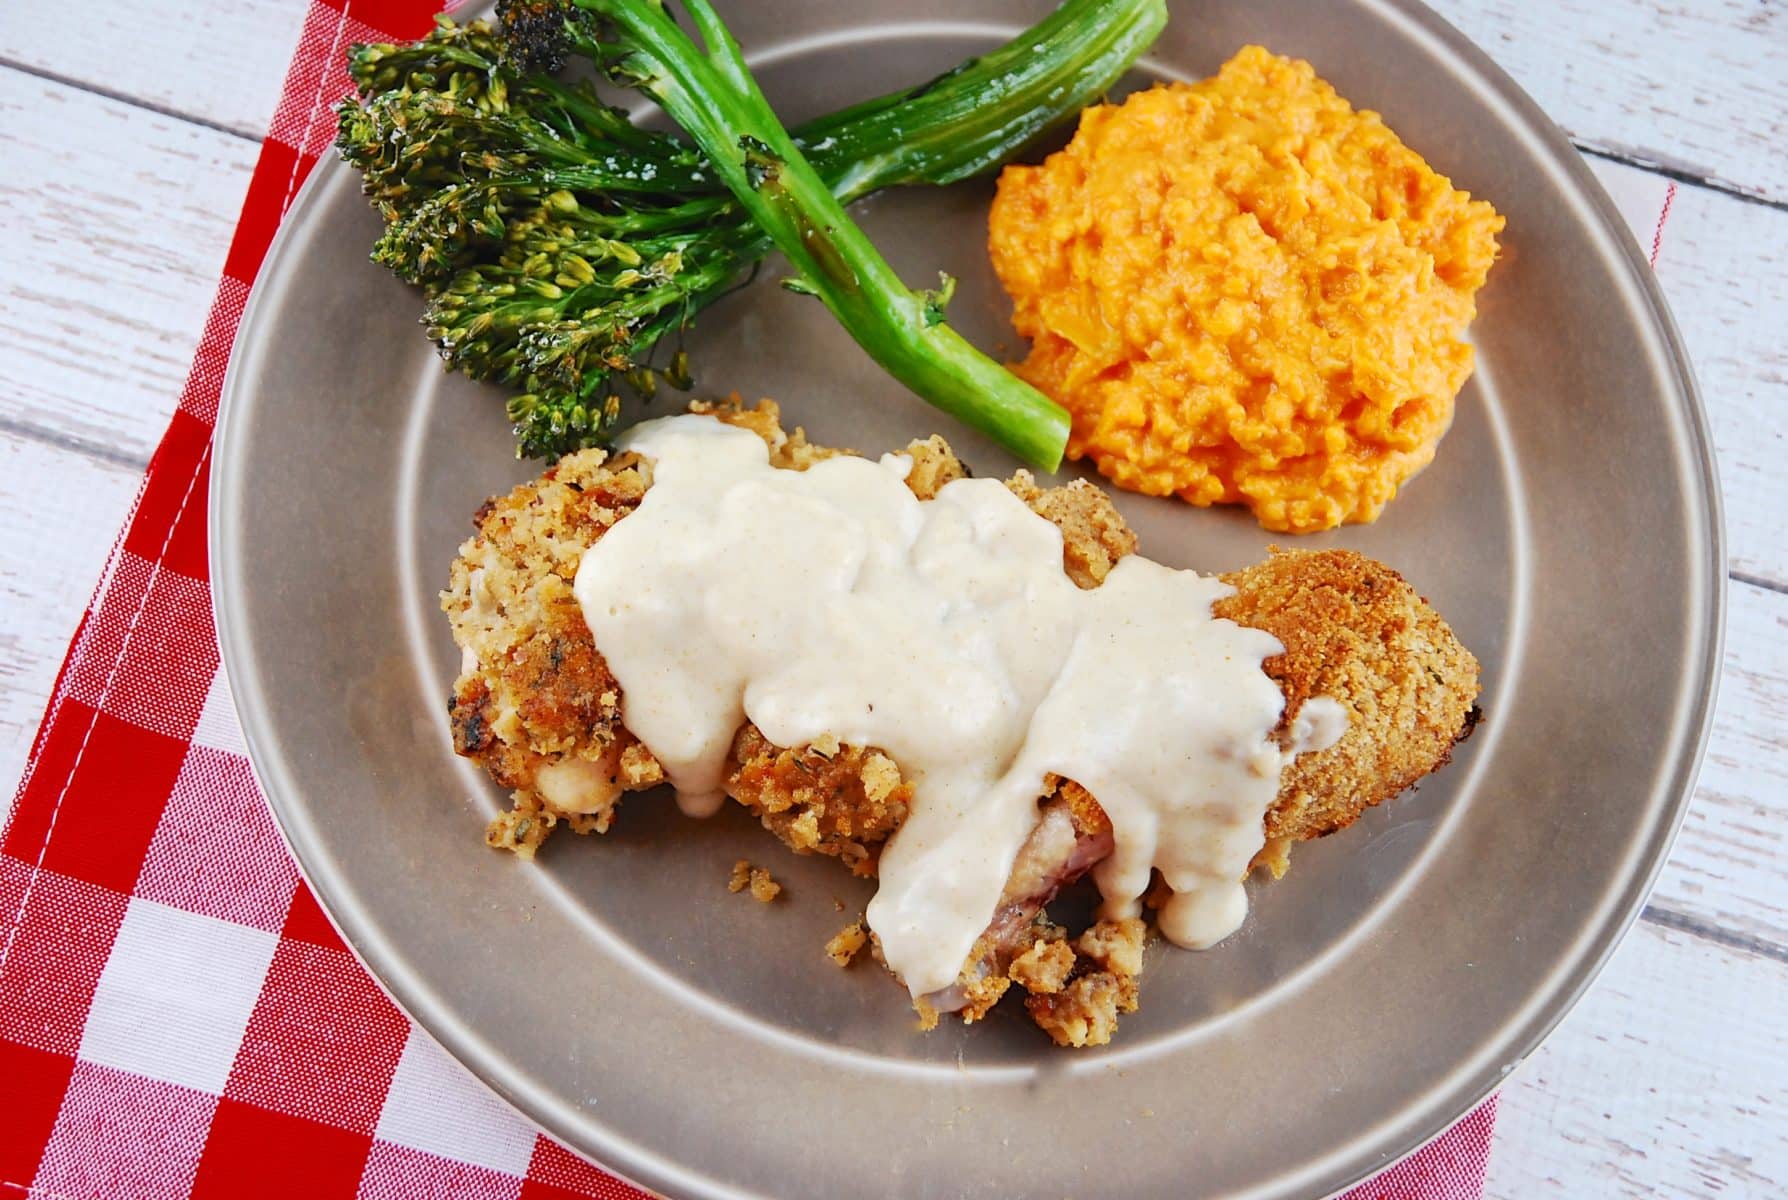
I’m already looking forward to this coming weekend. After the winter we’ve had here in the Midwest, I want nothing more than the opportunity to experience spring, warmer weather, and lots of sunshine. Thankfully, that’s exactly what the upcoming weekend has in store, fingers crossed. Friday, we’re taking a family trip with the Baron’s parents and sister to Savannah, GA, and Hilton Head, SC for an extended weekend. I haven’t really felt the charm of the South yet, so I’m looking forward to getting a taste of the low country! In honor of our trip, I’ll be posting some southern-inspired recipes all this week. To start, these Country Fried Chicken Patties seem to capture Southern comfort on a plate. Seasoned ground chicken patties are battered up and fried before serving with a pan dripping gravy alongside mashed potatoes and steamed green beans.
I’m excited to break out of the Midwest. Yesterday was nice because it was warmer (in the 50s!) and sunny, but I’d love more. One of the first dishes that come to mind when I think of the South is fried chicken. And as my mind goes into other culinary tangents, another dish that pops up is country fried steak.
This recipe is kind of a mash-up of both fried chicken and country-fried steak, but instead of chicken breast, this recipe utilizes ground chicken. I like how the ground chicken is something I can really flavor up with fresh herbs and seasonings, ensuring every bite has something to offer.
It remains juicy and doesn’t dry out like chicken breast in other similar recipes. And you can’t forget just a touch of butter for richness, so thank you to PLUGRA for adding just a touch of deliciousness in the gravy that brings this dish all together.
Hey there, y’all! If there’s one dish that screams comfort, it’s country fried chicken. That crispy, golden crust hugging tender, juicy meat—man, it’s like a warm hug from grandma on a Sunday afternoon. I’ve been fiddling with this recipe for years, burning a few batches and nearly setting my kitchen on fire (true story), but I’ve finally got it down to an art. Today, I’m spillin’ all my secrets on how to make country fried chicken that’ll have everyone beggin’ for seconds. So, grab yer apron, and let’s get fryin’!
What Even Is Country Fried Chicken?
Before we dive into the how-to, let’s chat about what makes country fried chicken so darn special. It’s a Southern classic, where chicken pieces—could be a whole bird cut up or just some boneless breasts—are coated in a seasoned flour mix, sometimes dipped in egg or buttermilk, and fried up till they’re crunchy as heck. What sets it apart from other fried chicken? It’s often paired with a creamy white gravy, also called country gravy, that you drizzle over the top. It’s pure comfort food, meant to be eaten with mashed taters or biscuits on the side. Simple, hearty, and oh-so-good.
Now, I ain’t gonna waste yer time with a long-winded story—let’s get straight to makin’ this masterpiece I’m breaking it down step by step, with all the tips and tricks I’ve picked up along the way Whether yer a kitchen newbie or a seasoned cook, you’ll nail this.
Ingredients You’ll Need for Country Fried Chicken
First things first let’s round up what you need. Here are the ingredients for about 6 to 8 servings. I like to keep things simple but tasty. Adjust as ya see fit!.
- Chicken: Grab a whole fryer chicken (3-4 pounds), cut into pieces, or go for boneless breasts if you wanna skip the bone hassle. I’ve done both, and they’re equally yummy.
- Flour: About 1-2 cups of all-purpose flour for that crispy coating.
- Seasonings: 2 teaspoons of garlic salt, 2 teaspoons of black pepper, 1 teaspoon of paprika for a lil’ color, and ½ teaspoon of poultry seasoning for that herby kick. Feel free to toss in extras like chili powder if ya like it spicy!
- Eggs: 1-2 large eggs, beaten, to help the flour stick.
- Milk or Buttermilk: ½ cup of either. Buttermilk gives a tangy zing and tenderizes the meat, but regular milk works just fine too.
- Oil for Frying: Enough to fill a skillet about ¼ to 2 inches deep. I use vegetable oil or peanut oil ‘cause they got a high smoke point—don’t wanna burn the house down, ya know?
Quick Tip If you got buttermilk, use it It’s a game-changer for flavor and makin’ the chicken super tender. No buttermilk? No worries, just stick with milk or even make a fake buttermilk by adding a tablespoon of vinegar to regular milk and lettin’ it sit for 5 minutes
Tools You’ll Wanna Have Handy
You don’t need fancy gear, but here’s what helps:
- A big skillet or Dutch oven for frying.
- Tongs to flip the chicken without losin’ yer fingers.
- A thermometer to check oil temp—trust me, guessing ain’t worth the soggy results.
- Shallow bowls or containers for dredging.
- Paper towels for draining the grease.
Step-by-Step: How We Make Country Fried Chicken
Alright, let’s get to the good stuff. I’m walkin’ ya through every step like I’m right there in yer kitchen. Follow along, and you’ll be eatin’ like a Southern king or queen in no time.
Step 1: Prep Yer Chicken
If yer using a whole chicken, cut it into pieces—breasts, thighs, drumsticks, wings. I ain’t gonna lie, it’s a bit of a mess, but it saves ya money compared to pre-cut parts. Got boneless breasts? Pound ‘em down to about ¾ inch thick with a meat mallet or even a heavy pan. This helps ‘em cook even and quick. Rinse the chicken under cold water, pat it dry with paper towels—wet chicken don’t fry right, it just steams and gets sad.
Pro Tip: Dry chicken = crispy chicken. Don’t skip the patting dry part, or you’ll be cryin’ over soggy breading.
Step 2: Marinate for Flavor (Optional but Awesome)
This step ain’t a must, but if you got time, do it. Mix up a marinade with buttermilk, a pinch of salt, some pepper, and maybe a lil’ garlic or cumin if yer feelin’ fancy. Pour it into a big resealable bag, toss in the chicken, and let it chill in the fridge for 8 hours or overnight. I’ve done this plenty, and it makes the meat so dang juicy and flavorful, it’s worth the wait. No time? Skip to the next step, you’ll still be fine.
Step 3: Set Up Yer Dredging Station
Now, whether you marinated or not, it’s time to coat that bird. Set up two stations:
- Wet Mix: In a shallow bowl, beat the eggs with the milk or buttermilk. This is gonna help the dry stuff stick.
- Dry Mix: In another bowl or a big container with a lid, mix the flour with garlic salt, pepper, paprika, and poultry seasoning. Stir it good so every piece gets seasoned.
When I use a container with a lid, I can shake the chicken around like a maraca. It makes less of a mess and is more fun.
Step 4: Coat the Chicken Like a Pro
First, dip each chicken piece into the wet mixture. Let some of it drip off so it doesn’t get too thick. Then, toss it into the dry mix. When you use a container, put the lid on and shake it until it’s covered. Wanna extra crispy? Do the dip-and-dredge again—double coat that sucker. I have found that double-dredging gives you that crazy crunch that’s just chef’s kiss. Don’t stack the coated pieces; just put them on a plate.
Step 5: Heat Up That Oil
Put oil into a big skillet or Dutch oven. The oil should be about ¼ inch deep for skillet frying and 2 inches deep for deep-frying. Heat it to 375°F. Put a small amount of flour in the pan if you don’t have a thermometer. If it sizzles right away, you’re good to go. If it’s too hot, it burns; if it’s too cold, the chicken soaks up oil like a sponge. I’ve messed this up before, and greasy chicken isn’t good for anyone.
Step 6: Fry That Chicken to Golden Glory
Carefully lower a few pieces into the hot oil—don’t crowd the pan, or the temp drops, and ya get mushy chicken. Fry ‘em for about 7-10 minutes per side if it’s bone-in, or 2-3 minutes per side for boneless. Flip ‘em with tongs when they’re golden brown on one side. You’re lookin’ for that perfect golden crust and clear juices when ya poke it. Internal temp should hit at least 165°F if yer checkin’ with a thermometer. I usually do a test piece first to make sure I ain’t undercookin’ or overdoin’ it.
Step 7: Drain and Rest
Once fried, pull the chicken out and set it on a plate lined with paper towels to soak up extra oil. Let it rest a couple minutes—don’t cover it, or the crust gets soggy. I’ve made that mistake, and it’s heart-breakin’ to lose that crunch.
Whippin’ Up Some Country Gravy to Go With It
Country fried chicken ain’t complete without a creamy white gravy to pour over it. Here’s a quick way I do mine:
- Melt 2 tablespoons of butter in a small pot over medium heat.
- Whisk in 2 tablespoons of flour, a pinch of salt, and some pepper till it’s smooth—no lumps, y’all.
- Slowly pour in 1-2 cups of milk, whiskin’ the whole time so it don’t clump up.
- Bring it to a boil, cook for a minute or two till it thickens, and that’s it!
Drizzle that stuff over yer chicken, and you’re in heaven. I sometimes add a lil’ extra pepper for kick.
What to Serve With Yer Country Fried Chicken
This dish shines with the right sides. Here are my go-to’s that pair up real nice:
- Mashed Potatoes: Creamy, buttery, and perfect for soppin’ up gravy.
- Biscuits: Fresh outta the oven, split ‘em open and slather with more gravy.
- Collard Greens: A lil’ bitter, a lil’ bacon-y—balances the richness.
- Mac and Cheese: ‘Cause who don’t love cheesy goodness with fried chicken?
- Corn on the Cob: Sweet and simple, keeps things Southern.
I’ve had this with a fresh tomato salad too, when I’m feelin’ like I need some green on the plate. Mix and match, make it yer own!
Tips and Tricks I’ve Learned the Hard Way
I’ve botched enough batches to know what works and what don’t. Here’s some wisdom to save ya from my mistakes:
- Oil Temp Is Everything: Keep it around 375°F. Too low, and yer chicken’s a greasy mess; too high, and the outside burns before the inside cooks. I’ve cried over burnt crusts, don’t do it.
- Don’t Crowd the Pan: Fry in batches. Crowdin’ drops the oil temp and steams the chicken instead of fryin’ it. Patience, my friend.
- Double Dredge for Crunch: Like I said earlier, dip and coat twice if ya want that extra crispy bite. It’s a lil’ more work, but worth every second.
- Buttermilk Magic: If ya can, marinate in buttermilk overnight. It tenderizes the meat and adds a tangy depth that regular milk just can’t match.
- Check the Temp: If yer unsure it’s cooked, use a meat thermometer. 165°F internal temp means it’s safe to eat. I’ve cut into raw chicken before, and it’s a mood killer.
Variations to Switch Things Up
Wanna tweak this recipe to fit yer style? I’ve played around with a few twists, and here’s what I’ve come up with:
- Spice It Up: Add chili powder, cayenne, or even hot sauce to the flour mix for a fiery kick. I’ve done this for game night, and folks loved the heat.
- Bake Instead of Fry: If fryin’ ain’t yer thing or ya wanna cut the oil, coat the chicken as usual, spritz with a lil’ cooking spray, and bake at 400°F for about 25-30 minutes, flippin’ halfway. It ain’t as crispy, but it’s still tasty. I do this when I’m feelin’ lazy.
- Cajun Vibes: Mix in some Cajun seasoning to the flour for a bold, smoky flavor. Pairs great with spicy gravy. I’ve tried this, and it’s a crowd-pleaser.
- Boneless Bites: Use chicken tenders or cut breasts into strips for smaller, quicker pieces. Kids love ‘em, and they fry up fast. I make these for quick weeknight dinners.
Storin’ and Reheatin’ Yer Leftovers
If ya somehow got leftovers (rare in my house), here’s how to keep ‘em good:
- Fridge: Let the chicken cool to room temp, then store in an airtight container lined with paper towels to soak up moisture. It’ll last about 3 days.
- Freezer: Cool it down, lay the pieces on a baking sheet to flash freeze for an hour, then toss ‘em in a resealable bag. Good for up to 3 months.
- Reheating: From the fridge, let it sit out for 30 minutes, then reheat in an air fryer at 350°F for 5 minutes or oven at 400°F for 15 minutes till it hits 165°F inside. Frozen? Thaw overnight in the fridge first, then reheat. I’ve found the air fryer keeps it crispier than the oven.
Don’t microwave it unless ya want rubbery chicken—I learned that the hard way.
Why Country Fried Chicken Is Worth the Effort
Now, I know fryin’ chicken can seem intimidatin’. Hot oil, mess everywhere, the fear of undercookin’—I’ve been there. But lemme tell ya, when you bite into a piece of homemade country fried chicken, all that hassle fades away. It’s not just food; it’s memories of family dinners, picnics, and lazy Sundays. I remember the first time I got it right—my buddies couldn’t stop eatin’, and I felt like a freakin’ chef. Plus, makin’ it yourself means you control the flavors, the quality, and the love ya put in.
Common Questions I Get Asked
Over the years, folks have hit me with all kinda questions about this dish. Here’s a quick rundown of the ones I hear most:
- Can I use somethin’ besides buttermilk? Yup, regular milk works, or even a mix of milk and a splash of vinegar to mimic buttermilk. I’ve done both, no biggie.
- What if I don’t got a thermometer? Test the oil with a pinch of flour—if it sizzles right away, yer probably close to 375°F. For the chicken, cut into a piece; clear juices mean it’s done. I’ve winged it like this plenty of times.
- How do I keep the coating from fallin’ off? Make sure the chicken’s dry before dredging, and press the flour mix on good. Double-dredging helps too. I’ve lost coating before, and it sucks, but this fixes it.
- Can I make it ahead for a party? Fry it up, cool it, and store in the fridge. Reheat in batches in an oven or air fryer right before servin’. I’ve done this for BBQs, and it’s a hit.
A Lil’ History Behind the Dish
I ain’t no historian, but I’ve heard country fried chicken got roots deep in the South, where fryin’ was a way to make tough cuts of meat tender and tasty. It’s tied to Southern hospitality—think big family gatherings, church suppers, and potlucks. Over time, it became a staple, with every family havin’ their own twist on the recipe. I like to think I’m carryin’ on that tradition every time I fire up the skillet.
Final Thoughts From My Kitchen to Yours
Makin’ country fried chicken is more than just cookin’—it’s a lil’ bit of magic. It brings people together, fills bellies, and makes ya feel like you’ve accomplished somethin’ real. I’ve shared every trick I know, from gettin’ that perfect crust to pairin’ it with the best sides and gravy. So, don’t be scared to give it a shot. Mess up a batch? Laugh it off and try again. That’s how I got here, and now I’m passin’ the torch to you.
Got yer own tips or twists on this recipe? I’d love to hear ‘em! Drop a comment or shoot me a message, ‘cause I’m always down to learn somethin’ new. Now, go fry up some chicken and make yer kitchen smell like a Southern diner. You got this, y’all!
Country Fried Chicken Patties
- Total Time: 30 minutes
Chicken Patties:
- 1 pound ground chicken
- salt and pepper to taste
- 2 teaspoons garlic powder
- 1/4 cup fresh parsley, minced
For dredging:
- 1 cup all purpose {GF blend} flour
- 1 teaspoon black pepper
- 3 eggs
- 3 tablespoons vegetable oil, or as needed
Gravy:
- GF blend flour, plus more if you want it; salt and pepper to taste; 2 teaspoons garlic powder; 1 tablespoon unsalted PLUGRA butter; 1 cup low-sodium beef broth
- Salt, pepper, garlic powder, and parsley should all be mixed together in a large bowl with the chicken.
- Cut the chicken into four pieces and press them into thin patties. Warm a big skillet over medium-low heat until it’s almost smoking. Add the patties and cook for about 4 minutes on each side, until they are browned. Take them out of the pan and set them aside.
- Take out the extra grease, but leave any browned bits in the pan.
- Mix 1 cup of flour, salt, and black pepper in a shallow dish. In a different shallow dish, beat the eggs with a little water.
- Heat the vegetable oil in the skillet over medium heat. Dredge both sides of the cooked patties in the seasoned flour, then in the eggs, and finally back in the seasoned flour. Do this three times to give the patties a thick coating.
- Fry the patties in hot oil for about 5 minutes on each side, or until golden brown on both sides. Remove patties from pan and set aside.
- Spoon away any excess vegetable oil. Melt the butter in a skillet over medium-low heat. Stir the pan to get rid of any brown bits that are stuck at the bottom. Whisk in 1 tablespoon of flour until smooth. If you prefer a very thick gravy, use more flour.
- Slowly whisk in the beef broth, and cook until the gravy gets thick. Add salt and black pepper to taste, and then pour the gravy over the chicken patties.
- Author: WCC
- Prep Time: 20 minutes
- Cook Time: 10 minutes
Keywords: country fried chicken patties
History Behind the Dish
Rooted deeply in Southern American culture, fried chicken became a staple for many households. The idea of frying chicken dates back to the Middle Ages in the Western world. In particular, the Scots liked to fry their chicken, and when they came to America, they brought this cooking method with them. As time went on, it mixed with other Southern US cultures, creating the country fried chicken patties we know today.
Choosing side dishes While these patties are a star on their own, complementing them with mashed potatoes, coleslaw, or even buttered corn can elevate your meal.
Dressing up the plate Presentation is essential. Place your patties on a bed of lettuce, drizzle some gravy, and maybe even sprinkle some freshly chopped herbs on top.