There are many great resources out there on how to process a chicken at home. But what about all the other details of processing day? Supplies, setup, storage, help? After a few rounds of processing chickens at home on our homestead, our formerly suburban family shares everything we’ve learned to get you fully ready for processing day.
Processing your own chickens for meat is a skill that connects you directly to your food source. Whether you’re a homesteader raising Cornish Cross broilers or simply looking to cull older laying hens knowing how to properly process chickens is valuable knowledge that humans have practiced for thousands of years.
I’ve been processing my own chickens for several years now, and while it’s never exactly fun, it’s incredibly rewarding. In this guide, I’ll walk you through the entire process from preparation to packaging, with all the steps needed to humanely and efficiently turn a live chicken into freezer-ready meat for your family
Why Process Your Own Chickens?
Before we get into the how-to, let’s quickly talk about why you might want to eat your own chicken.
- Quality control: You know exactly how the bird was raised and handled
- Cost savings: Raising and processing your own meat can be more economical
- Self-sufficiency: Valuable skill for homesteading and food independence
- Connection to food: Understanding where your food comes from
- Humane treatment: Ensuring the animal is treated with respect throughout its life and death
Preparing for Chicken Processing Day
Equipment You’ll Need
You don’t need fancy tools to process chickens, but having the right ones makes the job a lot easier:
- Sharp knives (boning knife and kitchen scissors work great)
- Killing station (culling cone or homemade setup)
- Large pot for scalding (30-quart stockpot works well)
- Heat source (propane burner, wood fire, etc.)
- Clean work surface (stainless steel table is ideal)
- Buckets for offal, feathers, and waste
- Cooler with ice for chilling processed birds
- Garden hose or water source for cleaning
- Bleach or sanitizer for cleaning surfaces and tools
- Vacuum sealer or freezer bags for storage
- Optional: plucker (homemade or purchased)
Preparing the Birds
For the best results, follow these steps before processing:
- Withhold feed for 12-24 hours before butchering (but always provide water)
- Keep birds calm prior to processing to prevent stress
- Plan to process early morning when temperatures are cooler
- Have an ice bath ready to chill carcasses quickly
Step 1: Humane Culling Methods
The most stressful part of processing chickens is the actual culling. Here are the most common methods:
Method 1: The Culling Cone
This is my preferred method:
- Place the chicken upside down in a culling cone
- The cone keeps the bird calm and prevents wing flapping
- With a sharp knife, make a deep cut across the neck, severing both carotid arteries
- Look for two jets of blood in an upside-down V shape
- Allow the bird to bleed out completely (about 3-5 minutes)
Method 2: Neck Dislocation
Some people prefer this method:
- Hold the chicken’s legs in one hand
- Place your other hand over the head, with thumb and forefinger on either side of the neck
- Pull down firmly and quickly while bending the head back
- You’ll feel a pop as the spinal cord separates
Method 3: The Axe Method
Traditional but requires skill:
- Use a stump or chopping block
- Hold the chicken by its feet
- Stretch the neck across the block
- Use a sharp axe to remove the head with one clean stroke
- Allow the bird to bleed out
Whichever method you choose, the bird will likely flutter and move after death. This is a normal reflex and doesn’t mean the bird is suffering.
Step 2: Scalding and Plucking
Once the bird is bled out, the next step is removing feathers:
- Heat water to approximately 145-150°F (63-65°C)
- Hold the bird by the feet and dunk in hot water for 30 seconds, agitating slightly
- Test a few feathers – they should pull out easily
- If feathers don’t come out easily, dunk again for a few more seconds
- Begin plucking immediately while the bird is still warm
- Pull feathers in the direction opposite to growth
- Focus on larger feathers first, then smaller ones
- Pay special attention to wing tips, tail area, and around the vent
If you’re going to be processing more than one bird, you should get a chicken plucker or make your own. It makes this tedious job much quicker.
Alternatively, you can skin the chicken instead of plucking. This is faster but you lose the skin and some flavor.
Step 3: Eviscerating the Chicken
This is where things get messy, but it’s actually pretty straightforward:
Removing the Feet
- Find the joint between the scaly leg and the foot
- Cut through this joint (not the bone) with a sharp knife
- Keep the feet for making gelatin-rich broth if desired
Removing the Head and Neck
- If not already removed during culling, cut the head off at the base of the neck
- You can keep the neck for stock or remove it
- Pull back the skin from the neck to expose the crop, trachea, and esophagus
- Carefully pull these away from the breast meat
Removing Internal Organs
- Make a small horizontal cut just below the breastbone, being careful not to puncture intestines
- Extend the cut down toward the vent (cloaca)
- Cut carefully around the vent to free it from the carcass
- Reach inside the cavity and gently pull out all organs
- The organs should come out as a connected package
- Separate the heart, liver, and gizzard if you want to keep them
- Clean the gizzard by cutting it open and removing the inner lining and contents
- Rinse the cavity thoroughly with cold water
Step 4: Final Cleaning and Chilling
After evisceration:
- Inspect the cavity for any remaining bits of organ, lung, or kidney tissue
- Remove the oil gland at the base of the tail if you haven’t already
- Rinse the bird thoroughly inside and out with cold water
- Place the cleaned bird in an ice bath immediately
- Chill for at least one hour before packaging
- Drain excess water before packaging
Step 5: Cutting and Packaging
Once the bird is thoroughly chilled, you can:
- Leave it whole for roasting
- Cut it into parts (breasts, thighs, wings, etc.)
- Package as desired in vacuum-sealed bags or freezer bags
- Label with the date and weight
- Refrigerate (if using within 2-3 days) or freeze (for longer storage)
For the best quality, use the chicken within 9-12 months of freezing.
What to Do With the Extra Parts
Don’t waste any part of the bird:
- Feet: Make gelatin-rich bone broth
- Neck: Use in stock or soup
- Heart: Cook and eat – delicious sautéed with garlic
- Liver: High in iron, great for pâté
- Gizzard: Clean well and use in gravy or fry
- Fat: Render for cooking
- Bones: Make nutritious bone broth
- Offal and feathers: Compost or bury deeply
Tips for Success
- Work with a partner if possible – it makes the job much easier
- Keep everything clean – sanitize surfaces regularly
- Process in cool weather when possible
- Start with just a few birds if you’re a beginner
- Don’t rush – take your time to do it right
- Be respectful of the animal throughout the process
Legal Considerations
It is important to know that you can process chickens for your own use, but if you want to sell them, you usually have to follow USDA rules and go through inspections. Check your local laws before selling any meat.
Final Thoughts
Processing your own chickens isn’t for everyone, but it’s a valuable skill that connects you directly to your food source. With practice, the process becomes more efficient, though never exactly enjoyable. I’ve found that approaching the task with respect for the animal and gratitude for the sustenance it provides makes it a meaningful part of a self-sufficient lifestyle.
Remember, humans have been processing their own meat for thousands of years – it’s a skill that’s well within your reach with a little practice and the right guidance.
To the Freezer!
From there, your birds are ready to head to the freezer (or fridge for fresh eating). Move them to the freezer as quickly as you can following the packaging. Keep in mind what we mentioned above to not overstock any one freezer with fresh chickens.
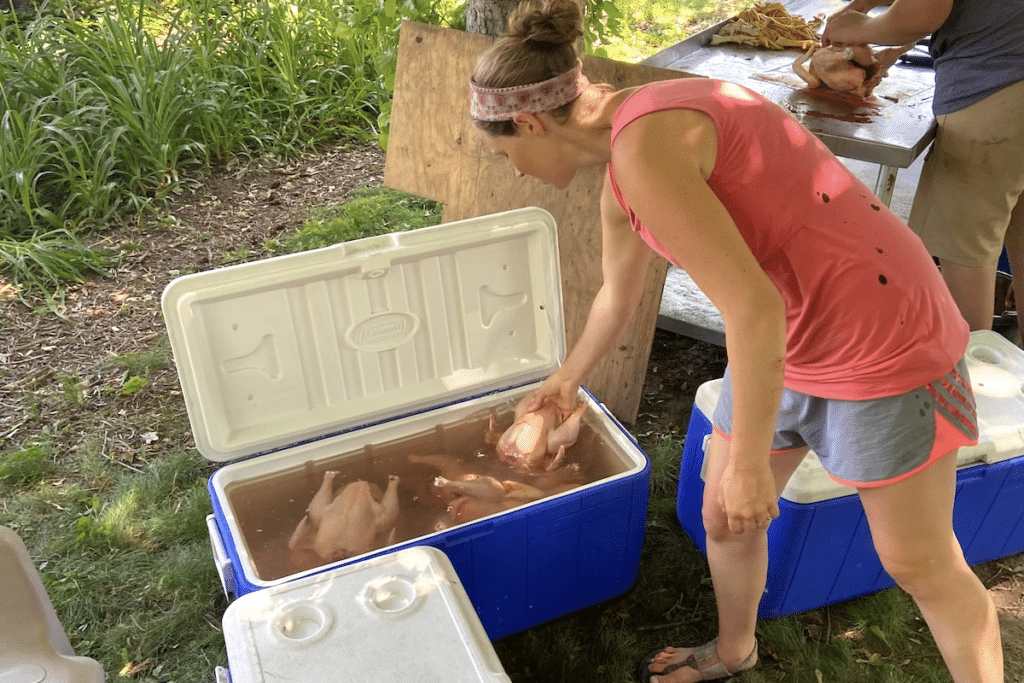
Chilling Down the Birds
Once you are left with the chicken in its final form before packaging, you need to chill down the birds. You do this by submerging them in cold water. Multiple methods can be used – cleaned out sinks, stock tanks, or storage bins are fine options. Our preference is to use coolers.
We fill the coolers with cold water and submerge the birds fully in them. Coolers are also great because they have a cover to keep flies away. Make sure you have enough space to fit your birds in. If the coolers will be empty for more than two hours before the chickens are frozen, you should also have ice or ice packs on hand to add to the water and cool the birds even more.
Here’s a list of what to have on hand:
- Coolers (or another water holding option)
- Hose
- Bags of ice or ice packs (optional)
From here on out, everything with the process should be kept clean.
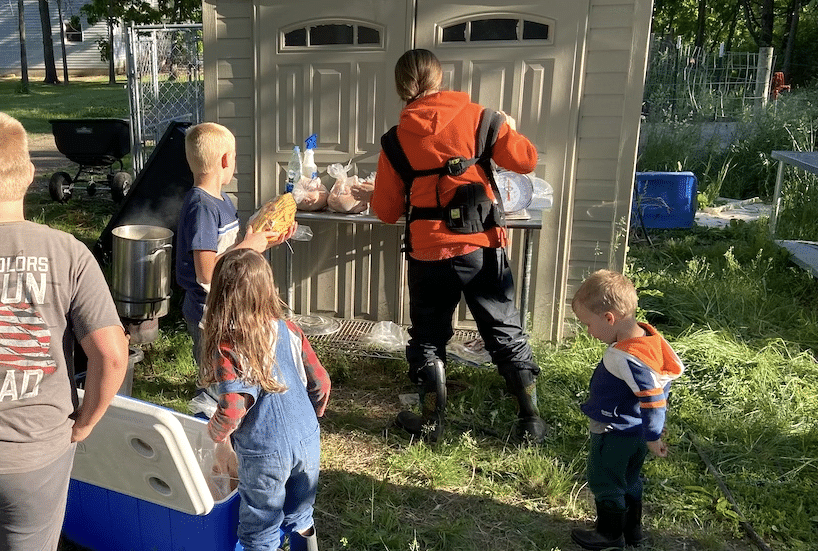
You will want another clean, sturdy table ready for packaging your chickens. At this table you’ll have chicken bags, zip ties, straws, some fresh towels, and don’t forget a pair of pliers to really draw the zip ties tight after the bags have shrunk.
Next to the table is your large pot on a burner with a propane tank for shrinking the bags. We used a turkey frier. If you are using the same pot you used for scalding make sure to dump the water, clean the pot, and start fresh. The temperature needs to remain between 190-205°F so you’ll want to monitor the temperature fairly closely. Have a thermometer on hand.
This is also your last chance to check on the birds to make sure everything was taken off correctly or to pluck any feathers you forgot. The lungs are easy to miss, so double check for those!.
I also like to tip the bags upside down once the chickens are inside and give it a good shake to make sure all the liquid has drained prior to zip tying and shrinking.
Here’s a list of what to have on hand for chicken processing at home:
- Large pot + burner + propane
- Lighter
- Thermometer
- Chicken bags (or other packaging supplies)
- Zip ties
- Straws
- Pliers
- Towels
Chicken Processing From Start To Finish | Step By Step With Cost | Simple & Easy
FAQ
How to process chickens for meat?
When it comes to processing your birds for meat, you need to follow the right procedure. This procedure is lengthy and involves several steps starting from butchering to scalding the bird all the way to storage. Many people hire experts to help them with the butchering of their chickens.
Can a chicken be processed at home?
Compared to, say, cows, meat chickens don’t need as much space to be raised, they use their food well, and you can process them at home with just a sharp knife and a big pot. This post will go through all of the steps to process a chicken at home. Obviously, this is “graphic”.
How to cook a chicken for meat?
Cut the skin open to the breastbone. Take care not to cut the intestines. Pull everything out of the body including the intestines. The last stage in to process a chicken for meat includes removing the inside content, chilling and storage. Here, you will have to reach deep into the chicken’s body cavity to get rid of everything.
Is it necessary to butcher a chicken?
If you keep chickens on a homestead, butchering a chicken is a reality you must occasionally face, especially if you are raising meat chickens. While the prospect may seem unpleasant, the right methods help make the process painless for the chicken and easier on your conscience.
How do you butcher a chicken?
Butchering a chicken involves several steps. First, prepare the chicken and dispatch it using a humane process. Then, pluck the bird, clean, and gut the carcass. Once properly processed, the chicken is ready for cooking or freezing.
Is it cost-effective to butcher your own chicken?
Yes, it can be cheaper to butcher your own chicken, especially if you’re raising the chickens yourself. You’ll save on the cost of purchasing chicken from a store and have control over the entire process, ensuring the quality and freshness of the meat.
How long should chickens be off feed before butchering?
The optimal feed withdrawal period of 8 to 12 hours should be strived for as much as possible to minimize fecal and digesta contamination of carcasses and pathogen contamination while at the same time maximizing potential yield.
What are the steps to processing a chicken?
Processing: How are chickens slaughtered and processed for meat?Step 1: Arrival at the Processing Plant. Step 2: Stunning. Step 3: Slaughter. Step 4: “Evisceration” . Step 5: Cleaning and Chilling. Step 6: Inspection by the U. S. Department of Agriculture (USDA) . Step 7: Additional Testing. Step 8: “Second Processing”.
How soon after butchering a chicken can you cook it?
How Long Should a Chicken Rest After Being Cut Up? Everyone wants to eat a fresh chicken right away, but you should wait 24 hours before cooking it. Mar 30, 2023.
How are free range chickens killed?
Humane Slaughter Our chickens are collected in crates where they will be nestled together in small groups. The chickens are all stunned before slaughter and are either slaughtered using a electrified water or CO2.